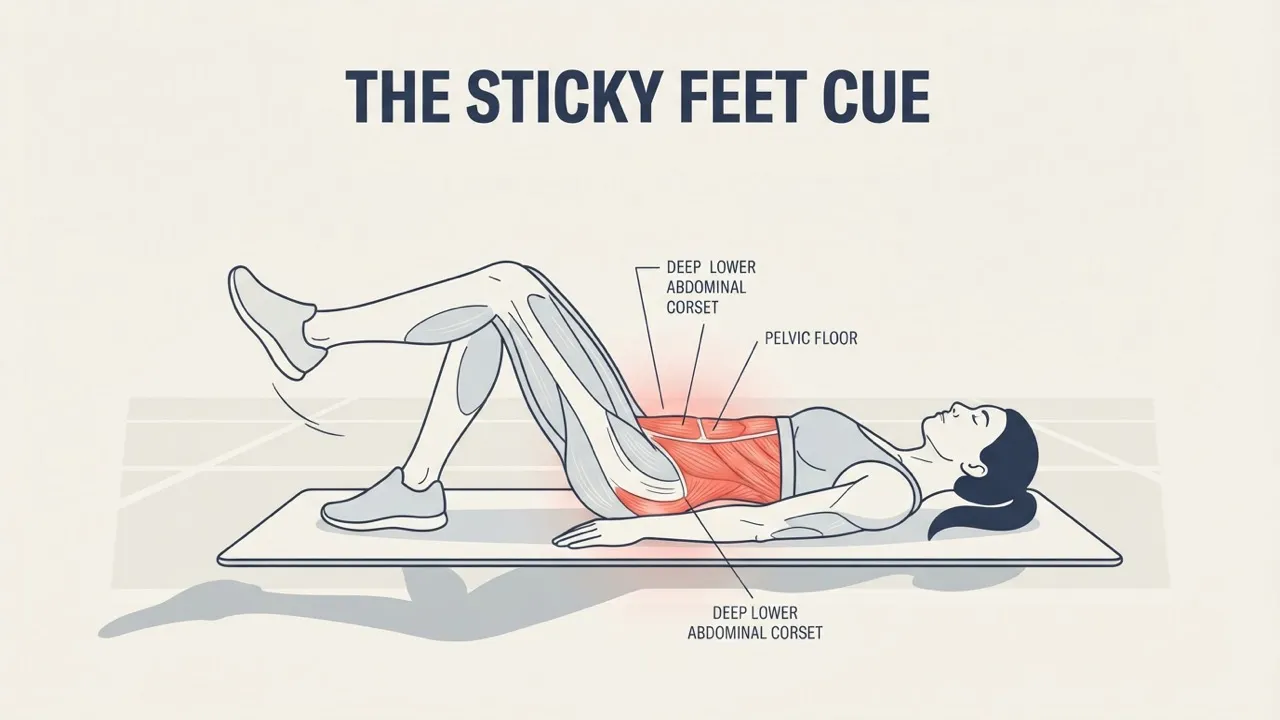
Imagine chewing gum under your feet and make your techniques on the mat better
We are back with another instalment of Explain the Cue, and this month we are looking at the motivation for “sticky feet”. You will hear us use this cue whenever we are doing mat Pilates exercises in single or double float.
The exercise
Start by lying on your back, knees bent. Use a towel to make sure your neck is well supported. Concentrate on your pelvis, feeling for the position where your tailbone feels flat on the mat – notice that this gives you a neutral, small curve in your lower back, away from the mat.
Take a breath in to prepare, deep and wide. As you breathe out, lift the pelvic floor, deepen the navel towards the spine, and lift one leg. Hold there for a deep and wide breath in and, as you breathe out, lift the pelvic floor, deepen the navel towards the spine, and lower the leg. Alternate legs and repeat 8-10 times.
The goal of the exercise
Like many exercises in Pilates, this seemingly simple, easy movement is designed to activate your deep abdominal muscles (transversus abdominus) and the pelvic floor – your pelvic stabilisers or ‘core’. Once your core is properly activated, your lower back and pelvis will stabilize your entire body as you move your legs throughout the day.
To do the exercise correctly, the tailbone must stay flat on the mat, not digging in or peeling off, and the lower back curve must be maintained – no arching or flattening. If your pelvis and lower back don’t stay in this position, the target muscles will not be activated, and you will be moving your legs for nothing!
So how does chewing gum fit into all of this?
This is where “sticky feet” can help. Each time you start to lift a foot off the mat, imagine that the mat is coated in a sticky substance – like chewing gum – preventing you from pulling it off quickly. In response, lift the heel first, rolling through the foot, so your big toe is the last thing to leave the ground. This allows for you to really prepare the muscles about the pelvis, turning them on and being mindful of your pelvis posture not changing.
Keep this ‘stickiness idea’ going throughout the exercise! As your leg lifts through the air, imagine it is moving through a thick fluid – like honey – so that the movement is slow and the leg feels heavy as it moves. As you lower the leg, again imagine pushing it through thick honey, touching the mat with your big toe very lightly and slowly, softly, reversing the lifting motion, rolling your foot down as if you are trying not to squash something soft and fluffy – like cotton wool.
These visualization cues slow down your movements and ensure you maintain full control. This will ensure your lower back and pelvis stay steady, stable and anchored, which will fully engage the deep core muscles both before, during and after you lift your leg. Imagining your sticky feet will also stop muscles about the hip and leg engaging and working in place of the real target- your pelvic stabiliser muscles.
What “sticky feet” actually means (and what it doesn’t)
“Sticky feet” is not about the surface of your mat — a slippery mat won’t stop the cue from working, and a grippy mat won’t do the work for you. It’s a mental picture: the mat is imaginary chewing gum, and your job is to peel each foot away as slowly and as controlled as you can. In practice that means three things every time a foot leaves the floor: heel first (the big toe is always the last part to leave), slow in both directions (up through “honey”, down through “honey”), and pelvis still (the tailbone stays flat on the mat while the leg moves). If the foot snaps up or the pelvis tips, the sticky-feet picture has been lost — and so has the deep-core work.
Common mistakes the sticky-feet cue fixes
The cue exists to stop three very common mistakes in single-leg float exercises:
- Yanking the leg up. A quick lift switches the work to the hip flexors and lets the deep core switch off. The chewing-gum picture forces a slow, heel-led peel that keeps the pelvic stabilisers in charge.
- Letting the pelvis rock or the tailbone peel off the mat. The moment your tailbone digs in or lifts, you’ve stopped stabilising and started moving. Cue yourself: tailbone flat, small curve in the lower back maintained, pelvis level.
- Holding your breath. Slow movements invite breath-holding. Keep the wide, deep breaths going — breathe out as the leg lifts, breathe out as it lowers — and the pelvic floor keeps timing with the movement instead of bracing.
How to practise sticky feet this week
Add the cue to any supine leg-lift exercise you already do — single-leg float on your back is the classic, and it’s the exact setup taught in our Pilates Fundamentals program. Two ways to sharpen it: slow the lowering phase deliberately (aim for a 3-count down through the “honey”), and try it with eyes closed — if the pelvis still doesn’t move with eyes shut, the sticky feet picture is working. Expect the movement to feel harder, not easier: slower is stronger.
Cues like these are taught properly in our Pilates Fundamentals tutorials — the physio’s guide to moving well from your first class. For more cue explainers: the mango and the rack of ribs.